Battery switch on travel trailer function is crucial for managing your RV’s power. Understanding how these switches work—whether they’re single-pole, double-pole, or double-pole double-throw—is key to safe and efficient battery use. This guide breaks down everything you need to know, from connecting and disconnecting batteries to troubleshooting common problems and performing essential maintenance.
We’ll explore different switch types, their internal mechanisms, and the advantages and disadvantages of each. Learn safe handling practices, understand the importance of proper grounding, and discover how to easily access your switch for maintenance. We’ll also cover troubleshooting steps for a malfunctioning switch, common issues and solutions, and how to integrate your battery switch with other electrical components like solar panels and converters.
Battery Switch Types in Travel Trailers
Choosing the right battery switch for your travel trailer is crucial for managing your power sources and ensuring safe operation. Understanding the different types available helps you make an informed decision based on your specific needs and setup. This section details the common types, their workings, and their respective advantages and disadvantages.
Single-Pole Battery Switches
A single-pole battery switch is the simplest type. It’s essentially an on/off switch controlling one circuit. This means it can only connect or disconnect one battery to the trailer’s electrical system at a time.
| Switch Type | Mechanism Description |
|---|---|
| Single-Pole | A single switch lever controls the connection between one battery and the trailer’s electrical system. The switch is either fully on, connecting the battery, or fully off, disconnecting it. Think of it like a simple light switch. |
Advantages: Simple, inexpensive, easy to install and understand. Disadvantages: Limited functionality; only allows for one battery to be connected at a time. Not ideal for setups with multiple batteries or those needing to isolate batteries for maintenance.
Double-Pole Battery Switches
Double-pole switches control two circuits independently. In a travel trailer context, this often means controlling two separate battery banks (e.g., one for house functions, one for starting the tow vehicle). Each pole operates independently, allowing for individual control over each battery bank’s connection to the trailer’s electrical system.
| Switch Type | Mechanism Description |
|---|---|
| Double-Pole | Two separate switch levers control two distinct circuits, typically connecting two separate batteries to the trailer’s electrical system. Each lever can be independently switched on or off. |
Advantages: Allows independent control of two battery banks. This is useful for isolating a battery for maintenance or preventing discharge from one bank affecting the other. Disadvantages: Still doesn’t allow for combining battery banks; slightly more complex than a single-pole switch.
Double-Pole Double-Throw (DPDT) Battery Switches
A DPDT switch is more sophisticated. It allows for connecting either one battery or both batteries to the trailer’s system, or disconnecting both completely. This offers the greatest flexibility in managing power sources.
| Switch Type | Mechanism Description |
|---|---|
| Double-Pole Double-Throw (DPDT) | Each pole has two positions. One position connects a battery to the system; the other connects a different battery, or isolates the circuit. This allows for selecting either battery 1, battery 2, both batteries, or neither. |
Advantages: Maximum flexibility in managing multiple batteries; allows for combining power from both batteries or isolating them individually. Disadvantages: More complex to install and understand; more expensive than single or double-pole switches.
Connecting and Disconnecting Batteries
Connecting and disconnecting your travel trailer’s batteries using a battery switch is a crucial task for maintaining your power system and ensuring your safety. Doing it correctly prevents damage to your batteries and electrical components, and avoids potential hazards. This section Artikels the safe and efficient procedures.
Properly connecting and disconnecting your batteries is vital for the longevity of your batteries and the safety of yourself and others. Always remember that working with batteries involves potential risks, so careful attention to detail is essential.
Safe Battery Connection Procedure
Before you begin, make sure the battery switch is in the “OFF” position. This prevents accidental shorts or unintended connections. Follow these steps to safely connect your batteries:
- Inspect the Batteries: Check the batteries for any signs of damage, corrosion, or leaks. Clean any corrosion from the terminals with a wire brush and baking soda solution.
- Prepare the Connections: Ensure all connections are clean and tight. Loose connections can cause overheating and damage.
- Connect the Positive (+) Terminals First: Connect the positive cable to the positive terminal of the battery, ensuring a secure connection.
- Connect the Negative (-) Terminals: Connect the negative cable to the negative terminal of the battery.
- Turn the Switch ON: Once both terminals are securely connected, turn the battery switch to the “ON” position.
- Check for Voltage: Use a multimeter to verify that the batteries are providing the correct voltage.
Safe Battery Disconnection Procedure
Disconnecting your batteries is just as important as connecting them. Following these steps will prevent electrical shocks and damage to your system.
So, you’re an audiophile who loves to travel? Awesome! Check out this guide on creating the perfect audiophile travel setup to ensure your tunes sound amazing wherever you roam. But remember, all that sweet audio gear needs power! Understanding the battery switch on travel trailer function is key if you’re using a trailer for your adventures, especially for managing power to your hi-fi system and preventing drain on your house battery.
Get those tunes playing and your power sorted for a truly amazing trip!
- Turn the Switch OFF: Always begin by turning the battery switch to the “OFF” position. This cuts power to the batteries, preventing accidental shocks or shorts.
- Disconnect the Negative (-) Terminals First: Disconnect the negative cable from the negative terminal of the battery.
- Disconnect the Positive (+) Terminals: Disconnect the positive cable from the positive terminal of the battery.
- Inspect the Connections: After disconnecting, visually inspect the terminals and cables for any signs of damage or corrosion.
Battery Handling Safety Checklist
Safety should always be your top priority when handling batteries. This checklist will help you remember important safety precautions.
- Always wear safety glasses to protect your eyes from potential splashes of acid.
- Wear gloves to protect your hands from corrosion and acid.
- Work in a well-ventilated area to avoid inhaling any fumes.
- Never allow metal tools to touch both terminals simultaneously, as this can cause a short circuit.
- Keep children and pets away from the area while working with batteries.
- Have baking soda and water on hand to neutralize any spilled battery acid.
- If you encounter any unexpected issues, consult a qualified technician.
Grounding and Short Circuit Prevention
Proper grounding and avoiding short circuits are paramount when working with batteries. A short circuit can cause significant damage, fire, and even injury.
Ensure your battery system is properly grounded to prevent stray voltage and to provide a safe path for electrical current. A properly grounded system reduces the risk of short circuits and protects your electrical components. Always double-check all connections to make sure they are secure and that no bare wires are touching each other or metal parts of the trailer.
Using insulated tools and working in a dry environment further minimizes the risk of short circuits.
Battery Switch Location and Accessibility
Finding your travel trailer’s battery switch quickly can be crucial, especially in emergencies or when performing routine maintenance. The location significantly impacts ease of access and therefore, the overall convenience and safety of your RVing experience. A well-placed switch saves time and frustration, while a poorly placed one can lead to unnecessary difficulties.The typical location of a battery switch in a travel trailer is either in a readily accessible compartment near the batteries themselves, often in a dedicated battery bay, or sometimes inside a nearby storage compartment.
However, some manufacturers might place the switch inside the trailer’s main storage compartment, under a bench seat, or even within the electrical panel – all significantly impacting accessibility. Factors influencing placement include the trailer’s design, the location of the battery bank (which is often dictated by weight distribution needs), and the manufacturer’s priorities during the build process.
Sometimes, the switch’s placement is a compromise between ease of access and minimizing exposure to the elements.
Battery Switch Accessibility Issues
Inconveniently located battery switches present several problems. For instance, a switch tucked away in a hard-to-reach corner under the trailer, or requiring the removal of multiple panels or items to access, can delay crucial actions in emergencies such as needing to quickly disconnect the batteries to prevent further damage after an electrical surge or fire. Similarly, regular maintenance tasks, like checking the switch’s condition or cleaning corrosion, become unnecessarily difficult and time-consuming.
This can lead to neglected maintenance and potential safety hazards. Additionally, a poorly placed switch can make it harder to visually inspect the switch for any signs of damage or wear, which can be important for proactive maintenance. Finally, in situations where you need to jump-start the trailer’s battery, an inaccessible switch adds unnecessary steps to the process, potentially wasting valuable time.
Best Practices for Easy Battery Switch Access
To ensure easy access to your battery switch, consider these best practices. Before purchasing a travel trailer, inspect the location of the battery switch. If the location is inconvenient, consider it a significant drawback. Ideally, the switch should be easily visible and reachable without needing tools or extensive maneuvering. If the switch is located in a compartment, ensure the compartment door opens easily and fully, without obstruction.
Properly labeling the switch with clear, visible markings (e.g., “Battery Disconnect”) will help you and others quickly locate and identify it. Regularly check the switch’s functionality and condition to ensure it’s operating correctly and is free of corrosion or damage. If the switch is difficult to access, consider adding extra lighting near it to improve visibility in low-light conditions.
Finally, consider keeping a small, well-maintained tool kit near the battery switch for any minor adjustments or repairs that might be needed.
So, you’re an audiophile who loves to travel? Awesome! Check out this guide on creating the perfect audiophile travel setup to ensure your tunes are always top-notch, even on the go. But before you hit the road, remember your power source! Understanding the battery switch on travel trailer function is crucial for keeping your gear alive – and your music playing – on those longer adventures.
Knowing how to manage your power means more time enjoying your amazing sound system!
Troubleshooting Common Battery Switch Issues
Your travel trailer’s battery switch is a critical component, ensuring you can safely manage power to your house batteries and accessories. A malfunctioning switch can leave you stranded without lights, water pump, or other essential systems. Understanding how to troubleshoot problems is crucial for maintaining your trailer’s electrical system.
This section will guide you through common battery switch problems, their symptoms, and how to effectively diagnose and fix them. We’ll cover troubleshooting steps using a flowchart, and provide solutions to frequently encountered issues.
Battery Switch Troubleshooting Flowchart
This flowchart will help you systematically identify the cause of your battery switch malfunction. Follow the steps sequentially, checking your results at each stage.
| Problem | Possible Cause | Troubleshooting Step | Result |
|---|---|---|---|
| No power to trailer appliances | Battery switch is off. | Check the switch position. Turn it to the “on” position. | Power restored? (Yes: Problem solved. No: Proceed to next step.) |
| No power to trailer appliances | Blown fuse or tripped breaker in the battery switch circuit. | Inspect the fuse(s) or breaker(s) in the battery switch panel. Replace any blown fuses or reset any tripped breakers. | Power restored? (Yes: Problem solved. No: Proceed to next step.) |
| No power to trailer appliances | Faulty battery switch. | Test the switch for continuity using a multimeter. If no continuity, the switch needs replacement. | Continuity present? (Yes: Investigate other electrical components. No: Replace the battery switch.) |
| Intermittent power to trailer appliances | Loose or corroded connections at the battery switch. | Inspect all connections at the battery switch. Tighten loose connections and clean any corrosion. | Power consistent? (Yes: Problem solved. No: Investigate other electrical components.) |
| Sparks or burning smell near the battery switch | Short circuit in the battery switch wiring. | Disconnect the battery switch immediately. Contact a qualified RV technician to diagnose and repair the short circuit. | Short circuit addressed? (Yes: Problem solved. No: Consult an electrician.) |
Common Battery Switch Problems and Solutions
Here’s a list of common problems you might encounter with your battery switch and their corresponding solutions. Remember, always disconnect the battery before working on any electrical components.
- Problem: The battery switch is stuck in the “off” position. Solution: Try lubricating the switch mechanism with a penetrating lubricant. If this doesn’t work, the switch may need replacement.
- Problem: The battery switch is excessively hot to the touch. Solution: This indicates a potential short circuit or high current draw. Immediately disconnect the battery and consult a qualified technician.
- Problem: The battery switch makes a clicking sound when turned on but doesn’t provide power. Solution: This could indicate a faulty switch or a problem with the battery itself. Check the battery voltage and replace the switch if necessary.
- Problem: The battery switch intermittently works. Solution: This usually points to loose connections or corrosion. Inspect and clean all connections at the switch.
Symptoms of a Faulty Battery Switch and Differentiation from Other Electrical Problems, Battery switch on travel trailer function
A faulty battery switch can manifest in several ways, and it’s important to distinguish these symptoms from problems elsewhere in the trailer’s electrical system.
A faulty battery switch will typically result in a complete lack of power to the trailer’s 12V system when the switch is in the “on” position, assuming the batteries are charged. This is different from a blown fuse or tripped breaker, which would only affect a specific circuit. A problem with the batteries themselves (low charge or faulty battery) would also result in a lack of power but could be diagnosed by checking the battery voltage.
If the switch is clicking but not engaging, it’s a strong indication of a switch malfunction. A burning smell or sparking near the switch indicates a serious electrical fault that needs immediate attention.
Battery Switch Maintenance and Replacement
Keeping your travel trailer’s battery switch in top condition is crucial for reliable power. Regular maintenance prevents costly repairs and ensures you’re always ready for your next adventure. Neglecting maintenance can lead to corrosion, poor connections, and ultimately, battery switch failure. This section details a maintenance schedule and the process of replacing a faulty switch.
Routine Battery Switch Maintenance
A simple maintenance schedule can significantly extend the lifespan of your battery switch. This involves regular cleaning and visual inspection to identify potential problems early. Corrosion is the most common issue, and addressing it promptly prevents further damage.
Ideally, you should inspect your battery switch at least twice a year, or more frequently if you live in a humid climate or store your trailer outdoors. This inspection should include:
- Visually checking for corrosion on the terminals and switch body. Look for white, green, or powdery deposits.
- Checking for loose connections. Ensure all wires are securely fastened.
- Cleaning the terminals with a wire brush and baking soda solution. Apply the solution, scrub, and rinse thoroughly with water. Allow to dry completely before reconnecting.
- Lubricating the switch mechanism (if applicable) with a dielectric grease to prevent corrosion and ensure smooth operation.
Replacing a Faulty Battery Switch
Replacing a battery switch is a relatively straightforward task, but safety precautions are essential. Working with batteries and electrical systems requires caution. Always disconnect the negative battery terminal before starting any work.
- Disconnect the negative battery cable from the battery. This is crucial to prevent accidental short circuits.
- Use a wrench or socket to remove the nuts securing the wires to the battery switch terminals. Note the position of each wire to ensure correct reconnection.
- Remove the screws or bolts holding the battery switch in place. The location and type of fasteners will vary depending on the switch and installation.
- Carefully disconnect the wires from the old switch, taking note of their placement. Take photos if needed.
- Install the new battery switch, ensuring it’s securely mounted. The new switch should be the same type and amperage rating as the original.
- Reconnect the wires to the new switch, matching their original positions. Ensure the connections are tight and secure.
- Reconnect the negative battery cable to the battery. Double-check all connections before testing.
- Test the new switch functionality (see below).
Testing Battery Switch Functionality with a Multimeter
A multimeter is an invaluable tool for testing the functionality of your battery switch. This allows you to verify proper operation and identify any internal problems before reconnecting the battery.
To test the switch, you’ll need a multimeter set to measure DC voltage. Follow these steps:
- Set your multimeter to measure DC voltage (usually indicated by a symbol resembling a battery).
- Turn the battery switch to the “ON” position.
- Connect the red lead of your multimeter to the positive (+) battery terminal and the black lead to the negative (-) battery terminal.
- Note the voltage reading. It should be close to the battery’s rated voltage (e.g., 12V for a 12V battery). A significantly lower reading indicates a problem with the battery, the switch, or the connections.
- Turn the battery switch to the “OFF” position.
- Check the voltage reading again. It should read close to zero volts. A significant voltage reading indicates the switch is not fully disconnecting the circuit, posing a safety risk.
If the voltage readings are as expected in both “ON” and “OFF” positions, your battery switch is functioning correctly. Any significant deviation from these expected readings indicates a problem requiring further investigation or switch replacement.
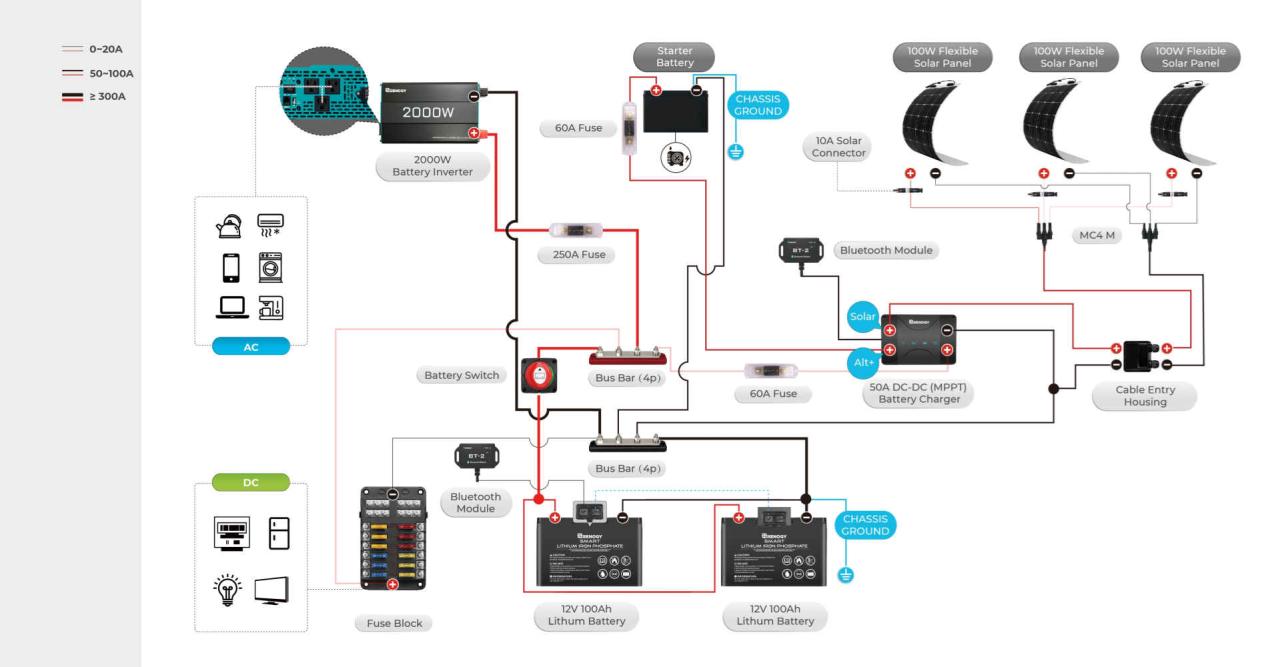
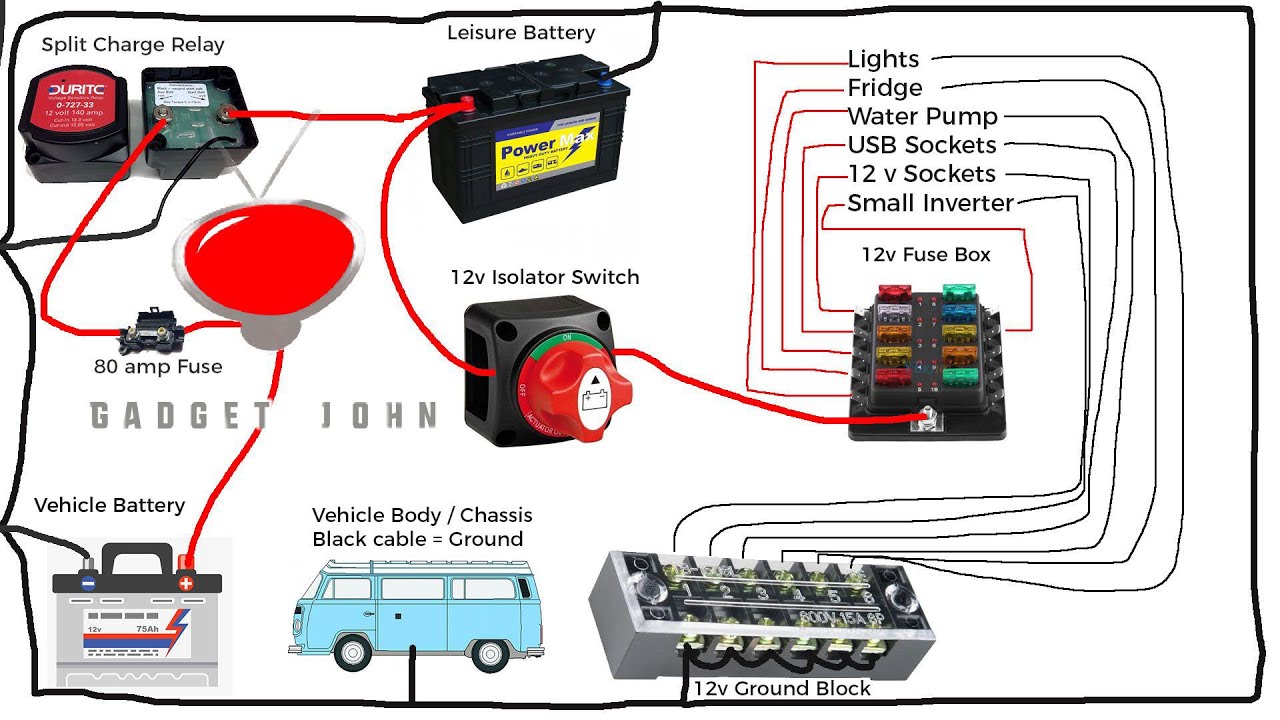
Battery Switch and Electrical System Integration: Battery Switch On Travel Trailer Function
Your travel trailer’s battery switch isn’t just a simple on/off switch; it’s a crucial component that manages the flow of power throughout your RV’s electrical system. Understanding how it interacts with other parts is key to maintaining a reliable power supply and preventing electrical issues. This section will clarify the relationships between the battery switch and other key electrical components.The battery switch acts as the central control point for your trailer’s 12-volt DC system.
It determines whether power from your house batteries flows to the various DC appliances and systems, and, importantly, it also influences how your system interacts with external power sources. A properly functioning switch is essential for safe and efficient use of your trailer’s electricity.
Battery Switch Connections and Functions
The following table illustrates the connections between the battery switch and other essential components of a typical travel trailer’s electrical system. Understanding these connections helps in troubleshooting and maintenance.
| Component | Connection Type | Function |
|---|---|---|
| House Batteries | Direct Connection | Provides the primary 12V DC power source for the trailer. The battery switch controls the flow of power from these batteries to other components. |
| Converter/Charger | DC Input | Receives 12V DC power from the house batteries (when the switch is on) to charge the batteries and power the AC-to-DC conversion process. |
| 12V DC Appliances (lights, water pump, etc.) | DC Output | Receive 12V DC power from the house batteries through the switch. The switch controls whether these appliances operate on battery power. |
| Solar Panel Charger Controller | DC Input/Output | Connects to the batteries, and the battery switch controls whether the solar panel’s charging power flows to the batteries. Some systems might bypass the switch for uninterrupted charging. |
| Shore Power Inlet | No Direct Connection (Indirect via Converter) | Shore power provides AC power, which is then converted to DC power by the converter. The converter charges the batteries and supplies power to the 12V DC appliances. The battery switch doesn’t directly control the shore power but controls the battery’s interaction with the converter. |
Impact of a Faulty Battery Switch
A malfunctioning battery switch can significantly impact your trailer’s electrical system performance. Problems can range from minor inconveniences to serious safety hazards. For example, a switch that doesn’t fully disconnect can lead to continuous battery drain, even when the trailer is not in use, potentially leaving you with a dead battery on your next trip. Conversely, a switch that fails to connect properly will prevent you from using any 12V DC appliances or charging your batteries.
In some cases, a faulty switch could even create short circuits or other electrical hazards. Regular inspection and maintenance of your battery switch are crucial to prevent these problems.
Mastering your travel trailer’s battery switch is essential for safe and reliable power. By understanding the different types of switches, safe handling procedures, troubleshooting techniques, and routine maintenance, you can ensure a smooth and enjoyable RV experience. Remember, regular inspection and preventative maintenance will extend the life of your battery switch and prevent costly repairs down the road.
So, get to know your switch and keep the power flowing!
Questions and Answers
How often should I inspect my battery switch?
Inspect your battery switch at least once a year, or more frequently if you use your travel trailer extensively.
What does it mean if my battery switch is hot to the touch?
A hot battery switch indicates a potential problem, such as a loose connection or a short circuit. Turn off the switch immediately and investigate the cause.
Can I use any type of battery switch in my travel trailer?
No, the correct type of battery switch depends on your trailer’s electrical system. Using the wrong type can damage your system or create safety hazards.
What should I do if my battery switch fails completely?
If your battery switch fails, you’ll need to replace it. Consult a qualified RV technician if you’re unsure how to do this safely.
